Thursday, December 10, 2020

Piparkakut (ilmainen neuleohje)

Hei vaan kaikille suomenkielisille lukijoillenikin!

Piparkakku-ukon neuleohje oli toinen Ravelryyn julkaisemani ohje vuonna 2008. Olin juuri päättänyt avata itselleni Ravelry-tilin ja kehittää omia neuleohjeita. Teini-ikäiselle se oli silloin tosi iso asia 😊


Vuosia on vierähtänyt ja päätin käydä läpi vanhoja julkaisemiani ohjeita ja piparkakkuohje tuli valituksi päivitystä varten ja samalla sitten päätin kääntää ja julkaista ohjeen myös suomeksi tyttöversion kanssa täällä blogissa. (En taida raaskia poistaa tuota teiniminän tekemää pdf-tuotosta). Itselläni meni noin tunti/pipari kaikkine keskeytyksineen, joten projektit on nopeita.


Tarvikkeet:

Ruskeaa lankaa, sukkapuikot (itse käytin Svarta Fåretin Tildaa ja 2,5mm puikkoja).

Erivärisiä langanjämiä koristeeksi

Täytevanua

Kanavaneula


Piparkakku-ukko

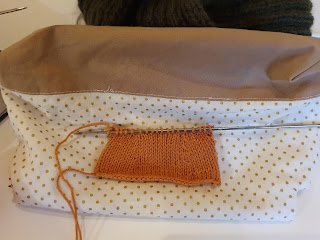
Aloita jaloista: Luo ruskealla langalla 6s, neulo 1 krs nurin.

Seuraava krs: 1o, [lisäys, 1o], toista [_] krs loppuun. Neulo sileää 7krs. Jätä silmukat odottamaan puikolle. Neulo toinen jalka samoin. Neulo molempien jalkojen silmukat oikein samalla puikolle ja luo 1 s molempien puikkojen lopussa.

Neulo 9 krs sileää.

Seuraava krs: *_* (olkapäät), 3o, 2oyht x3, 6o, 2o yhtx3, 3o. Neulo 1krs nurin tai 3krs sileää. (Saat itse valita, tein pojalle 3krs sileää ja tyttöön 1krs nurin, pään muoto vähän muuttuu).

Seuraava krs: 1o, lisäys, 2o, [lisäys, 3o] toista 5 kertaa.

Neulo sileää joko 7krs tai 9krs (riippuen siitä, teitkö kaulaan 1krs:n vai 3krs:ää).

Itse kavensin viimeisellä nurjalla kierroksella molemmissa 1s.

Seuraava krs: Neulo 2o yhteen koko kierros.

Katkaise lanka ja vedä silmukoiden läpi. Ompele jalkojen saumat ja sitten selän ja pään takasauma. Täytä pipari päästä ja viimeistele päälaki vasta täyttämisen jälkeen.


Kädet (neulo 2kpl)

Luo ruskealla langalla 8s, aloita nurjalla kierroksella ja neulo sileää 7krs.

Seuraava krs: 2o yhteen koko kerros. Katkaise lanka ja vedä silmuikoiden läpi. Ompele sauma ja täytä hieman. Ompele kiinni vartaloon.

Koristele pipari kirjomalla silmät, suu ja napit, sekä muut ”koristeet.”


Tyttöpipari

Luo ruskealla 32s. Aloita nurjalla neulo 3krs sileää.

Seuraava krs: 9o, 2oyht, 10o, 2oyht, 9o. 3krs sileää

Seuraava krs: 8o, 2oyht, 10o, 2oyht, 8o. 3krs sileää

Seuraava krs: 7o, 2oyht, 10o, 2oyht, 7o. 1krs nurin

Seuraava krs: 6o, 2oyht, 10o, 2oyht, 6o. 1krs nurin

Jatka kuten pipariukko kohdasta *_*.

Jalat: Luo ruskealla 11s, aloita nurjalla krs:llä ja neulo 3krs sileää.

Seuraava krs: 1o, sitten 2oyht kierros loppuun. Katkaise lanka ja vedä silmukoiden läpi. Ompele sauma ja täytä jalat kevyesti vanulla.

Kädet: samalla tavalla kuin piparkakku-ukko.

Ompele piparitytöltä ensin vartalon takasauma, täytä ja sen jälkeen helmasauma samalla kiinnittäen jalat paikoilleen. Ompele kädet vartaloon kuten piparkakku-ukolla.

Enpä ole ikuisuuksiin postannut suomeksi, saatikka sitten kirjoittanut neuleohjetta suomeksi. Toivottavasti ohjeesta on iloa näin suomenkielisenäkin versiona :)

 - Minttusuklaa

p.s. saat valmistaa ohjeella leluja myyntiin, mutta ethän myy ohjetta eteenpäin :) 

Gingerbreads (version 2, free knitting pattern)

 Gingerbread, updated version


So this is a "Throwback Thursday" post, because Gingerbreads was the second pattern I published in my Ravelry store, way back in 2008. I had just set up a Ravelry account and was thinking of starting a knitting blog and I really was a teenager back then. I hadn’t opened the pdf-file in my Ravelry store in ages, but during this year I’ve been thinking about revisiting my old patterns and updating them somehow. The gingerbread was the first one I decided to update and to be honest, the first pattern really shows that I was quite young back then. I had my brother’s small digital camera and took the photos on the living room floor, and of course there are spelling mistakes. To be honest I’m probably going to leave the original in my Ravelry store, I really don’t have the heart to delete it (brings me back too many memories…)

So I decided to publish the updated version here instead. I made the basic gingerbread man pattern more like in “my own style” with more detailed instructions and decided to make a girl version also.  

It took me about an hour to finish one, so this is a quick project.

You need

Brown yarn and matching DPNs. (I used Fingering yarn and 2,5mm needles)

Stuffing

Needle

Yarn for decorations


Gingerbread boy version

With brown, cast on 6sts. P1 row

Next row: K1, [m1, k1] to end. Beginning with P row st-st 7 rows. Leave the leg to a spare needle and knit the second leg the same way.

Knit across both needles and cast on 1sts in the end of both needles (24sts).

Beginning with P row, st-st 9 rows.

Next row: *_*Shape the shoulders: k3, k2togx3, k6, k2togx3, k3

St-st 3 rows or P1 row

(You can choose, it affects the shape of the head a little: I had 3 rows between the head and shoulders in the boy and just one row in the girl version).

Head: k1, m1, k2, [m1, k3] five times. St-st 7 rows/ 9 rows (depending how many rows you had in the neck, I also decreased 1sts in both ends of the last p row)

Next row: K2tog in every st.

Cut of yarn and pull it through the remaining stitches, don’t pull too tight yet.

Sew the leg seam, and then the back seam.

Stuff the toy and the close the top of the head. I tightened the neck with a bit of yarn.

Arms (make 2): cast on 8sts. Beginning with p row st-st 7 rows. Next row: K2tog in every st. Cut of yarn. Sew the back seam, stuff and sew to the body.

Embroider eyes, mouth, nose and then the decorations to the body.


Girl version:

Cast on 32 sts with brown. Beginning with P row st-st 3 rows.

Next row: k9, skpo, k10, k2tog, k9. St-st 3 rows.

Nr: k8, skpo, k10, k2tog,k8. St-st 3 rows 

Nr: k7, skpo, k10, k2tog, k7. P1 row 

Nr: k6, skpo, k10, k2tog, k6. P1 row.

Same as the gingerbread man from *_*.

Legs: cast on 11sts. St-st 3 rows Next row: K1, [k2tog] to end.

Arms: same as the gingerbread man.

Sew first the back seam and head of the girl, then stuff. Sew the leg’s seams and the arm’s seams Insert the legs and sew the bottom seam. Attach arms.


I hope you enjoy knitting these little gingerbreads and please tell me if you find any errors in the pattern.

- Minttusuklaa

 Copyright Minttusuklaa, you can sell toys made with this pattern, but don't sell the pattern itself.